Part 1 - Project Setup
In this first part of the tutorial, we will carry out the following tasks:
- Create a Python virtual environment.
- Install Django into the virtual environment.
- Create the Django project.
This section assumes that you already have Python installed (version >= 3.8). If not, please find the appropriate installation instructions for your operating system at this link.
Creating a Python Virtual Environment
First, we will create a virtual environment to install Django as well as the XCG packages and their dependencies. We will be using this virtual environment throughout the rest of this tutorial.
A virtual environment is a self-contained installation of Python which allows you to install, update, and remove Python packages for a specific project without affecting the functionality of other projects. When developing Python applications, it is recommended to create a single virtual environment for each project/application, and to install project dependencies into said environment. Switching between projects is a simple matter of activating the correct virtual environment. For more information, refer to the official Python documentation.
To do so, run the commands below in a shell program (e.g. bash, zsh, PowerShell, CMD). These commands will navigate to your home folder, create a folder for the tutorial called xcg-tutorial, and create a virtual environment named env within the tutorial folder.
- Unix/macOS
- Windows (PowerShell)
- Windows (CMD)
cd ~
mkdir xcg-tutorial
cd xcg-tutorial
python3 -m venv env
cd $HOME
New-Item -Path .\ -Name "xcg-tutorial" -ItemType "directory"
cd xcg-tutorial
py -m venv env
cd %USERPROFILE%
md xcg-tutorial
cd xcg-tutorial
py -m venv env
Once your virtual environment has been created, you can activate it using the command below:
- Unix/macOS
- Windows (PowerShell)
- Windows (CMD)
source env/bin/activate
.\env\Scripts\Activate.ps1
.\env\Scripts\activate.bat
If you are using PowerShell on Windows, your machine's execution policy may prevent you from running the virtual environment activation script. If you encounter an error, run the following command to enable script execution within your user's scope before trying the activation script again:
Set-ExecutionPolicy Bypass -Scope CurrentUser
Activating the virtual environment ensures that any packages you install will be isolated from your global Python installation. It also allows your project's application code to access the installed packages. You should see a (env) printed in front of your terminal prompt if the activation was successful, as shown in the examples below:
- Unix/macOS
- Windows (PowerShell)
- Windows (CMD)
(env) john@dev-machine:~/xcg-tutorial$
(env) PS C:\Users\John\xcg-tutorial>
(env) C:\Users\John\xcg-tutorial>
You can deactivate the virtual environment by running the command deactivate, which should work regardless of your operating system type. However, do not deactivate your virtual environment for the purposes of this tutorial.
Installing Django
Now that we have set up a parent project folder and created a virtual environment, we can move on to install Django, which is the web development framework that XCG builds upon.
Django is a high-level web development framework for Python that provides many libraries and tools to handle common tasks when building a website. XCG is built on top of Django as it provides various hooks that allow for behavioural modifications to defend against vulnerabilities. Outside of XCG, Django also comes with many security features that can be used out of the box. You can read the official Django documentation here.
To install the "Django" package, we need to make use of Pip, which is Python's package installer. Making sure that your virtual environment is still active, run the following command to install the latest version of Django using Pip:
- Unix/macOS
- Windows (PowerShell)
- Windows (CMD)
python3 -m pip install Django
python3 -m django --version
py -m pip install Django
py -m django --version
py -m pip install Django
py -m django --version
The second command confirms that Django has been installed by displaying the Django version, which should look something like 4.2 (your exact version may be different at the time you read this tutorial).
Pip is the package manager for the Python language. It allows you to install Python packages, which are pre-developed pieces of Python software such as libraries. By default, Pip looks for and installs software from the Python Package Index (PyPI), which is a public repository of software for Python, but it can also be configured to install software from other package indexes (e.g. private package indexes within your organisation).
If you installed Python from official sources (e.g. from https://python.org), Pip should have been installed automatically alongside Python. If for some reason Pip was not installed, refer to the following guide for installation instructions.
Creating the Django project
As a web development framework, Django expects projects to follow a particular folder structure and to include specific Python files. To ease the process of setting up a new project, Django provides a convenience tool called django-admin to generate the required project structure. Let's use this tool to set up our project by running the following command inside our xcg-tutorial folder:
django-admin startproject towncouncil
This should create a project folder named towncouncil inside your xcg-tutorial folder with the following structure:
towncouncil
├── manage.py
└── towncouncil
    ├── asgi.py
    ├── __init__.py
    ├── settings.py
    ├── urls.py
    └── wsgi.py
The Python code files within the "inner" towncouncil folder (e.g. asgi.py, urls.py) are standard Python modules that a Django project requires. The django-admin utility automatically generates these "boilerplate" files for you.
To verify that your Django project has been set up properly, execute the following commands to navigate to the "outer" towncouncil folder from your xcg-tutorial folder and start the Django development server:
- Unix/macOS
- Windows (PowerShell)
- Windows (CMD)
cd towncouncil
python3 manage.py runserver
cd towncouncil
py manage.py runserver
cd towncouncil
py manage.py runserver
If your project was set up correctly, you should see the output below in your terminal:
Performing system checks...

System check identified no issues (0 silenced).

You have unapplied migrations; your app may not work properly until they are applied.
Run 'python manage.py migrate' to apply them.

April 10, 2023 - 15:50:53
Django version 4.2, using settings 'towncouncil.settings'
Starting development server at http://127.0.0.1:8000/
Quit the server with CONTROL-C.
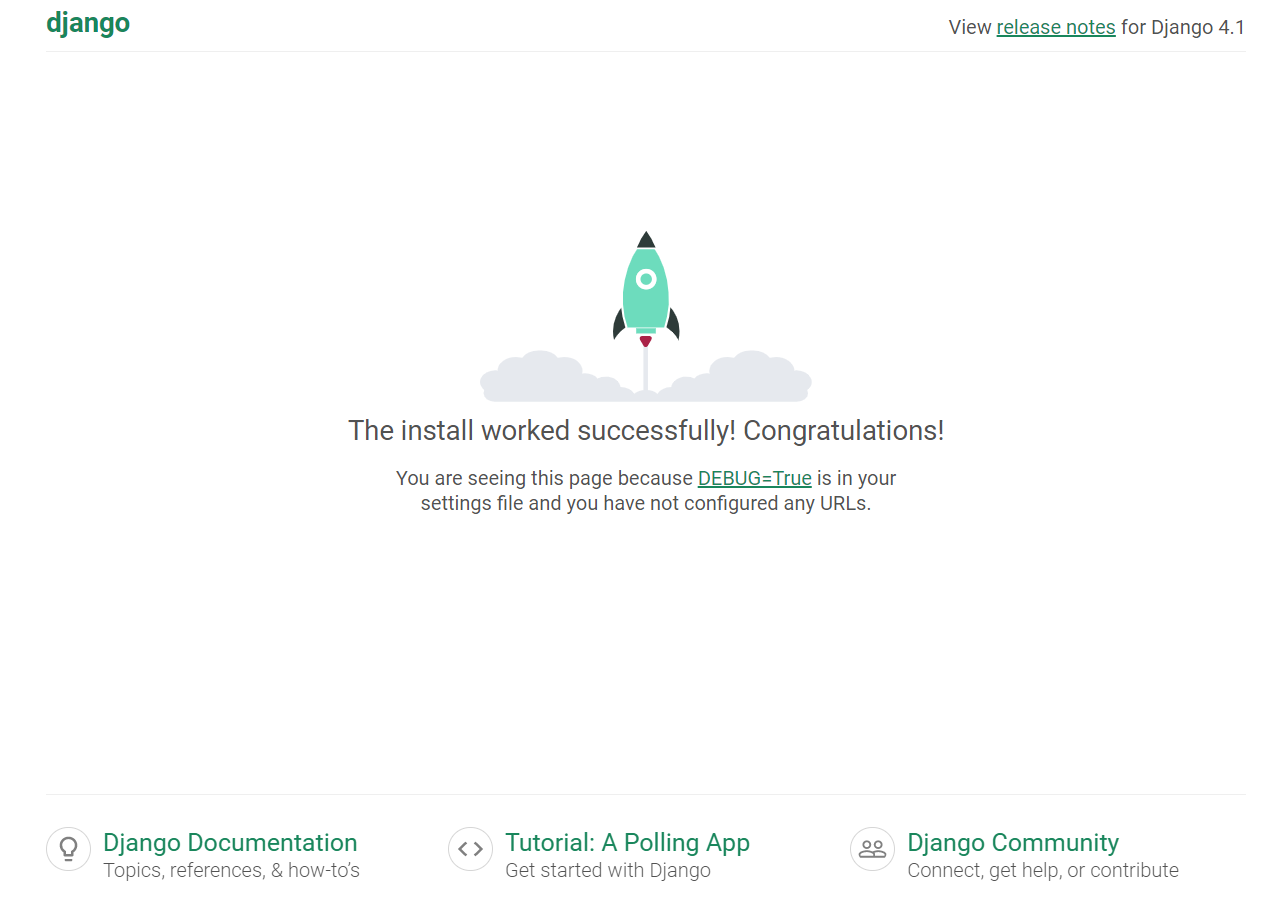
Now open up a web browser and visit http://127.0.0.1:8000/. You should see a "Congratulations!" page that Django comes with by default, signifying that your project is ready to go. You can stop the development server at any time by issuing the command "Ctrl-C" on Windows and Linux or "Cmd-C" on macOS, but for the purposes of this tutorial we will keep it running most of the time.
The Django development server is a lightweight web server written in Python that comes installed with Django. Its purpose is to provide a simple way to serve the Django website without requiring users to configure a separate webserver program such as Apache or Nginx. However, it is only suitable for development purposes and should not be used in production.
For more information on the development server, refer to the official Django documentation.