Part 3 - Submitting Issues
The core functionality of our website is that it enables members of the public to submit issues they observe in their estate. In this part of the tutorial, we will create the issue submission view as well as the backend logic that allows us to store issue data in a database. In the process, we will leverage on the Secure File Upload XCG package to restrict the type of images that users can submit as evidence.
Defining the Issue model
Before we create the issue submission view, we need a way to store data on submitted issues. To do this, we need to create a Django model, which is a Python class that represents a particular type of data. Each model generally corresponds to a table in your database.
A comprehensive description of Django models is beyond the scope of this document. However, some key points about models are listed below:
- Each model is a Python class that subclasses
django.db.models.Model. - Each model usually corresponds to a single database table (e.g. a
Usermodel maps to auserdatabase table). - Each attribute of the model represents a database field (e.g. a
Usermodel may have an attributefirst_namethat corresponds to a columnfirst_namein the database table). - With a model defined, Django provides an automatically-generated database-access API to make database queries.
For more information on models, refer to the official Django documentation
Let's begin by defining our data. For each issue, we want to store the following pieces of information:
- A short summary of the issue
- A detailed description of the issue
- The location where the issue was observed
- A picture providing evidence of the issue
- The "type" of issue, which can be "Facilities", "Road", "Sewerage", or "Others" (we will use this in later parts of the tutorial)
- The "status" of the issue, which can be "Open", "Pending", or "Resolved" (we will use this in later parts of the tutorial)
- The time of submission
Additionally, it would be helpful to retain some contact details of the submitter:
- The first and last name of the submitter
- The submitter's email address
- The submitter's phone number
We can create an Issue model that encapsulates these pieces of information. Open the models.py file inside the issues folder and replace any existing code with the code below:
from django.db import models
from django.utils import timezone
from django.core.validators import RegexValidator


class Issue(models.Model):
    # Personal particulars of submitter
    first_name = models.CharField(max_length=100)
    last_name = models.CharField(max_length=100)
    email = models.EmailField(max_length=100)
    phone = models.CharField(max_length=8, validators=[RegexValidator(regex="[986][0-9]{7}")])

    # Information about the issue
    summary = models.TextField()
    description = models.TextField()
    location = models.TextField()
    evidence = models.FileField(upload_to="uploads/issues/%Y/%m/%d")
    submit_date = models.DateTimeField("date submitted", default=timezone.now)
    type = models.CharField(
        max_length=10,
        choices=[
            ("Facilities", "Facilities"),
            ("Road", "Road"),
            ("Sewerage", "Sewerage"),
            ("Others", "Others"),
        ],
        default="Others"
    )
    status = models.CharField(
        max_length=8,
        choices=[
            ("Pending", "Pending"),
            ("Open", "Open"),
            ("Resolved", "Resolved")
        ],
        default="Open"
    )

    def __str__(self):
        return self.summary
django.db.modelsThe module django.db.models contains various classes that help with the creation of models for your apps. For example, it provides the base class Model, which every model class must inherit from in order to be recognised as a Django model. It also contains classes that represent different types of data fields, such as CharField, which represents a small to large-sized strings, or FileField which represents a generic file. These data field classes cover most of the basic data types and provide configuration options to restrict certain parameters of the data (e.g. you can set a max_length attribute on a CharField field). For more information, refer to the official Django documentation.
Having defined the model class, we now need Django to create the actual underlying database table with the required columns that correspond to the Issue model. This is done through a database migration, which is a process by which Django detects any structural changes in your models (e.g. addition/modification of a field) and automatically synchronizes the changes to your database. We can perform a migration by running these shell commands inside the outer towncouncil folder (the one containing manage.py):
- Unix/macOS
- Windows (PowerShell)
- Windows (CMD)
python3 manage.py makemigrations
python3 manage.py migrate
py manage.py makemigrations
py manage.py migrate
py manage.py makemigrations
py manage.py migrate
If there are no errors, the database migration has succeeded and your local SQLite database now contains a database table for issue data, with the columns defined by the Issue class' attributes. Run the development server again and visit http://127.0.0.1:8000/ to verify that your website is still working.
Django websites can integrate with various popular relational database management systems such as MySQL and PostgreSQL. By default, if you generate your project folders and files using django-admin and manage.py, your Django project is configured to use a local SQLite database, which is unsuitable for production, but convenient for local development. For more information on how to configure other database backends, refer to the official Django documentation.
Creating the issue submission view
Now that we have created the Issue model, we need to create a view that enables users to submit issues. The most common way to accept user input is via a web form, hence we will create a view that can both render and process an issue submission form.
Creating the form class
To facilitate the creation of forms, Django provides a Form class, along with some subclasses, that can represent various types of forms and simplify the process of validating form data. For this tutorial, we will create our own form class that subclasses the django.forms.ModelForm class. Create a file named forms.py in the issues folder and copy in the code below:
from django import forms
from .models import Issue


class IssueForm(forms.ModelForm):
    class Meta:
        model = Issue
        fields = [
            "first_name",
            "last_name",
            "email",
            "phone",
            "summary",
            "description",
            "location",
            "evidence",
            "type",
        ]
        widgets = {
            "first_name": forms.TextInput(
                attrs={
                    "class": "form-control",
                    "placeholder": "Given name",
                }
            ),
            "last_name": forms.TextInput(
                attrs={
                    "class": "form-control",
                    "placeholder": "Family name",
                }
            ),
            "email": forms.EmailInput(
                attrs={
                    "class": "form-control",
                    "placeholder": "Email address you check regularly",
                }
            ),
            "phone": forms.TextInput(
                attrs={
                    "class": "form-control",
                    "placeholder": "Phone number we can reach you at",
                }
            ),
            "summary": forms.TextInput(
                attrs={
                    "class": "form-control",
                    "placeholder": "Write a one-line summary of the issue",
                }
            ),
            "description": forms.Textarea(
                attrs={
                    "class": "form-control",
                    "placeholder": "Please describe the issue in as much detail as possible",
                }
            ),
            "location": forms.TextInput(
                attrs={
                    "class": "form-control",
                    "placeholder": "Please provide the estimated location of where this issue is",
                }
            ),
            "type": forms.Select(attrs={"class": "form-control"}),
        }
ModelForm classThe ModelForm class allows us to associate a form with a specific model such that:
- The form's HTML input fields can be auto-generated according to the model's fields and their data types.
- The form can perform input validation based on restrictions set by the model's fields (e.g. rejecting input that goes above the
max_lengthof aCharField)
For the purposes of this tutorial, we have opted to not fully utilize Django forms' HTML auto-generation capability so that we have more control over the form's look and feel. For more information on Django's built-in form functionality, please refer to the official Django documentation.
Creating the issue submission page template
Next, we need to create a template for the form submission page. Create a new file named submit_issue.html within the issues/templates/ folder and copy in the content below:
{% extends 'base.html' %}

{% block content %}
<div class="container col-lg-9">
  <div class="row justify-content-center">
    <div class="col-lg-6 col-md-12 mx-auto">
      <h1 style="font-weight: bold;">Issues Submission Form</h1>
      <p style="padding: 1rem 0">Submit your issues in the form below. The responder team will reach out to you as soon as possible to resolve your issue.</p>
    </div>
    <div class="col-lg-6 col-md-12 mx-auto"></div>
  </div>
</div>
<div class="container col-lg-11">
  <section class="shadow rounded p-5 my-8 mx-md-8" style="background-color: white;">
    <form id="issueform" method="post" enctype="multipart/form-data">
      {{ form.non_field_errors }}
      {% csrf_token %}
      <div class="mx-md-8">
        <div class="row">
          <div id="errorSubmission">
            {% if form.errors %}
            <div class="alert alert-danger">
              {{ form.errors }}
            </div>
            {% endif %}
          </div>
          <h1>Personal Particulars</h1>
          <div class="mb-3 col-md-6 col-12">
            <label class="form-label" for="{{ form.first_name.id_for_label }}">First Name*</label>
            {{ form.first_name }}
          </div>
          <div class="mb-3 col-md-6 col-12">
            <label class="form-label" for="{{ form.last_name.id_for_label }}">Last Name*</label>
            {{ form.last_name }}
          </div>
        </div>
        <div class="mb-3">
          <label class="form-label" for="{{ form.email.id_for_label }}">Email*</label>
          {{ form.email }}
        </div>
        <div class="mb-3">
          <label class="form-label" for="{{ form.phone.id_for_label }}">Phone*</label>
          {{ form.phone }}
        </div>
        <h1>Issue Encountered</h1>
        <div class="mb-3">
          <label class="form-label" for="{{ form.summary.id_for_label }}">Summary*</label>
          {{ form.summary }}
        </div>
        <div class="mb-3">
          <label class="form-label" for="{{ form.description.id_for_label }}">Description*</label>
          {{ form.description }}
        </div>
        <div class="mb-3">
          <label class="form-label" for="{{ form.location.id_for_label }}">Location*</label>
          {{ form.location }}
        </div>
        <div class="mb-3">
          <label class="form-label" for="{{ form.evidence.id_for_label }}">Evidence*</label>
          <p style="margin-bottom: 0;"><i>Only image files are allowed</i></p>
          {{ form.evidence }}
        </div>
        <div class="mb-3">
          <label class="form-label" for="{{ form.type.id_for_label }}">Type*</label>
          <p style="margin-bottom: 0;"><i>Type of issue</i></p>
          {{ form.type }}
        </div>
        <div class="mb-3">
          <div class="form-check">
            <input
              type="checkbox"
              id="agreement"
              class="form-check-input"
              required
            />
            <label title="" for="agreement" class="form-check-label">
              I agree to the terms of the Subscriber Agreement and the Privacy Policy
            </label>
          </div>
        </div>
      </div>
      <div class="d-flex justify-content-end my-8 mx-md-8">
        <button type="submit" id="submit" class="btn btn-secondary sgds">Submit</button>
      </div>
    </form>
  </section>
</div>
{% endblock %}
As can be seen, this template contains HTML that defines the structure of our web form. One new thing to note here is the use of the double curly brace ({{ }}) syntax. This is known as a template variable, which allows view functions to inject data into templates by passing in variables when invoking the render function. How this works will hopefully be clearer once we write the view function itself.
Creating the view function
With the IssueForm class defined and a template created for the issue submissions page, we now need to write the view function to integrate these elements. In the views.py file within the issues folder, add the code below to the end of the file:
from django.http import HttpResponse
from .forms import IssueForm


def submit_issue(request):
    if request.method == "POST":
        form = IssueForm(request.POST, request.FILES)
        if form.is_valid():
            form.save()
            return HttpResponse("Thank you for your submission!")
    else:
        form = IssueForm()

    return render(request, template_name="submit_issue.html", context={"form": form})
There are two points to note about the code snippet above:
- The code handles both returning a blank form (lines 11-12) as well as processing a submitted form (lines 6-10). Upon form submission, validating the data submitted is a simple matter of invoking the method
is_validon the form object. If the form is valid, invoking thesavemethod then uses the underlying model to persist data in the database. - In all cases, the code above passes the
IssueFormobject to therenderfunction, contained within thecontextdictionary (line 14). This passing of a variable is what enables the use of template variables in our form submission page template. See for example line 30 in the code above forsubmit_issue.html.
Accessing the issue submission view
The last thing to do before we can access the form submission view is to wire it up in urls.py. Open the urls.py file inside the issues folder and add the highlighted line below to the existing code:
from django.urls import path

from . import views


urlpatterns = [
    path("", views.index, name="index"),
    path("submit/", views.submit_issue, name="submit_issue"),
]
Now start the development server and visit http://127.0.0.1:8000/submit/. You should be able to view the issue submission form as shown in the screenshot below:
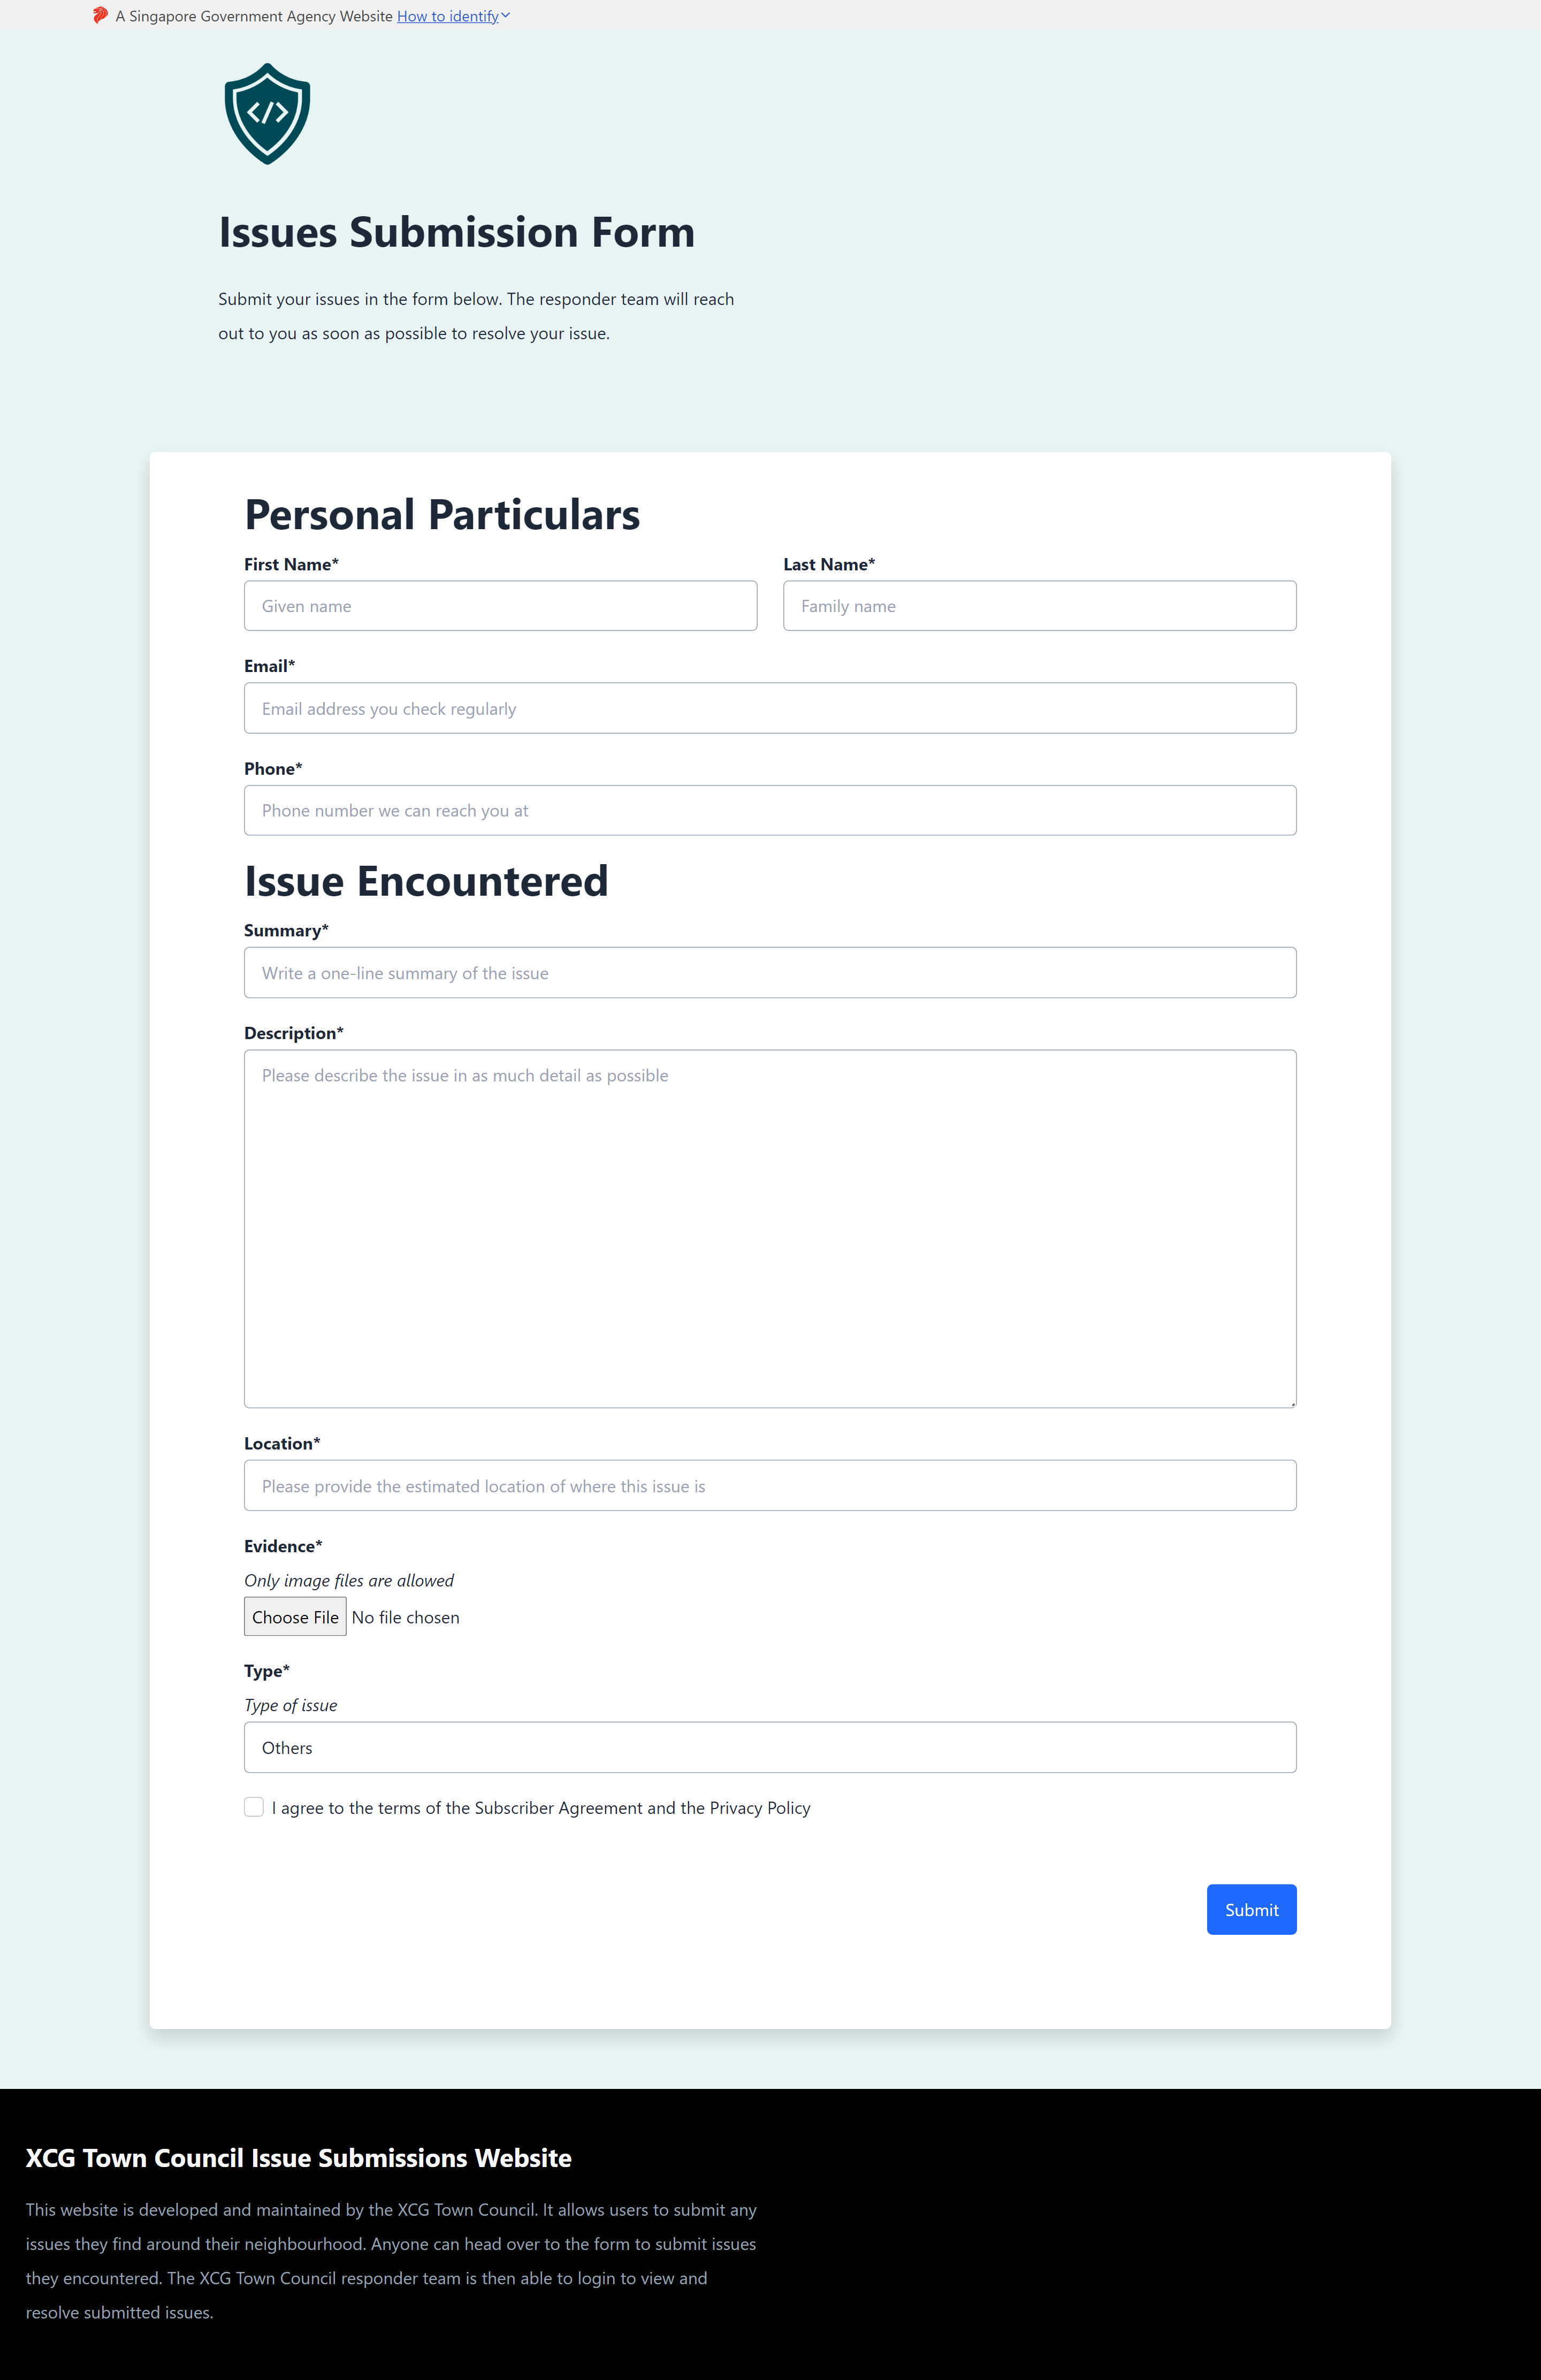
You should also be able to submit the form and receive an acknowledgement of submission.
If you are having difficulties following the tutorial up to this point, the full source code and configuration files for the towncouncil project folder can be downloaded using this link. Replace the contents of your outer towncouncil folder (the one containing manage.py) with the extracted contents of the downloaded zip file.
Improvements
There are two minor issues with our website in its current state. First, if we click on the button "Report any issues you've found here" in our landing page, it does not lead us to the issue submission page. Second, the acknowledgement page for issue submission is very bare, returning only the text "Thank you for your submission!". This sub-section will aim to fix these 2 issues. Since many of the concepts here have already been covered, we will run through the changes quite quickly.
First let's wire up the button in our landing page. To do this, open the file index.html inside your issues/templates/ folder and look for the HTML element representing the link to our issue submission page. You can do this by searching the template for the string "Report any issues you've found here", or by going to line 9 if you copied the code directly in the previous part of the tutorial. Change the value of the href HTML tag from "#" to "{% url 'submit_issue' %}" as shown in the "After" tab below:
- Before
- After
<a href="#" style="padding: 0.5rem; font-weight:bold; color: white; background: #004A57; border-radius: 5px; text-align: center; text-decoration: none;">Report any issues you've found here →</a>
<a href="{% url 'submit_issue' %}" style="padding: 0.5rem; font-weight:bold; color: white; background: #004A57; border-radius: 5px; text-align: center; text-decoration: none;">Report any issues you've found here →</a>
The url template tag allows us to specify the "name" of a view function, so that Django can dynamically map the name to the actual URL as defined by our URL configuration. This allows us to avoid having to hardcode URL paths in links, therefore preventing our links from breaking if we tweak the URL configuration. If you start the development server now and try to click on the button from the landing page, it should lead you to the issue submission page.
Next, let's create a more professional looking acknowledgement page for when users submit an issue. Create a file named thank_you.html in your issues/templates/ folder and copy in the code below:
{% extends 'base.html' %}

{% block content %}
<div class="container col-lg-9" style="padding-bottom: 5rem">
  <div class="row justify-content-center">
    <div class="col-lg-7 col-md-12">
      <h1 style="font-weight: bold;">Issue Submitted!</h1>
      <p style="padding: 1rem 0">Thank you for submitting an issue. Your issue is currently pending review from the responder team and you will be updated via email as soon as possible.</p>
    </div>
    <div class="col-lg-5"></div>
  </div>
  <div class="row justify-content-center">
    <div class="col-lg-9 col-md-12" style="text-align: center; padding: 3rem 0">
     <a href="{% url 'submit_issue' %}" style="padding: 0.5rem; margin-bottom: 3rem; font-weight:bold; color: white; background: #004A57; border-radius: 5px; text-align: center; text-decoration: none;">Found another issue? Submit a new issue form here →</a>
    </div>
  </div>
</div>
{% endblock %}
Now add the code below to the bottom of your views.py file within your issues folder:
def thank_you(request):
    return render(request, template_name="thank_you.html")
Wire up the view by adding the highlighted line below to urls.py in the issues folder:
from django.urls import path

from . import views


urlpatterns = [
    path("", views.index, name="index"),
    path("submit/", views.submit_issue, name="submit_issue"),
    path("thankyou/", views.thank_you, name="thank_you"),
]
Last but not least, we need to modify the code for the submit_issue view function to redirect a user to our new thank you page after they submit a form. Open views.py inside your issues folder and modify the code for and around submit_issue according to the highlighted lines below:
from django.shortcuts import redirect # Add the 'redirect' import
from django.http import HttpResponse
from .forms import IssueForm


def submit_issue(request):
    if request.method == "POST":
        form = IssueForm(request.POST, request.FILES)
        if form.is_valid():
            form.save()
            return redirect("thank_you") # Replace the line "return HttpResponse(...)"
    else:
        form = IssueForm()

    return render(request, template_name="submit_issue.html", context={"form": form})
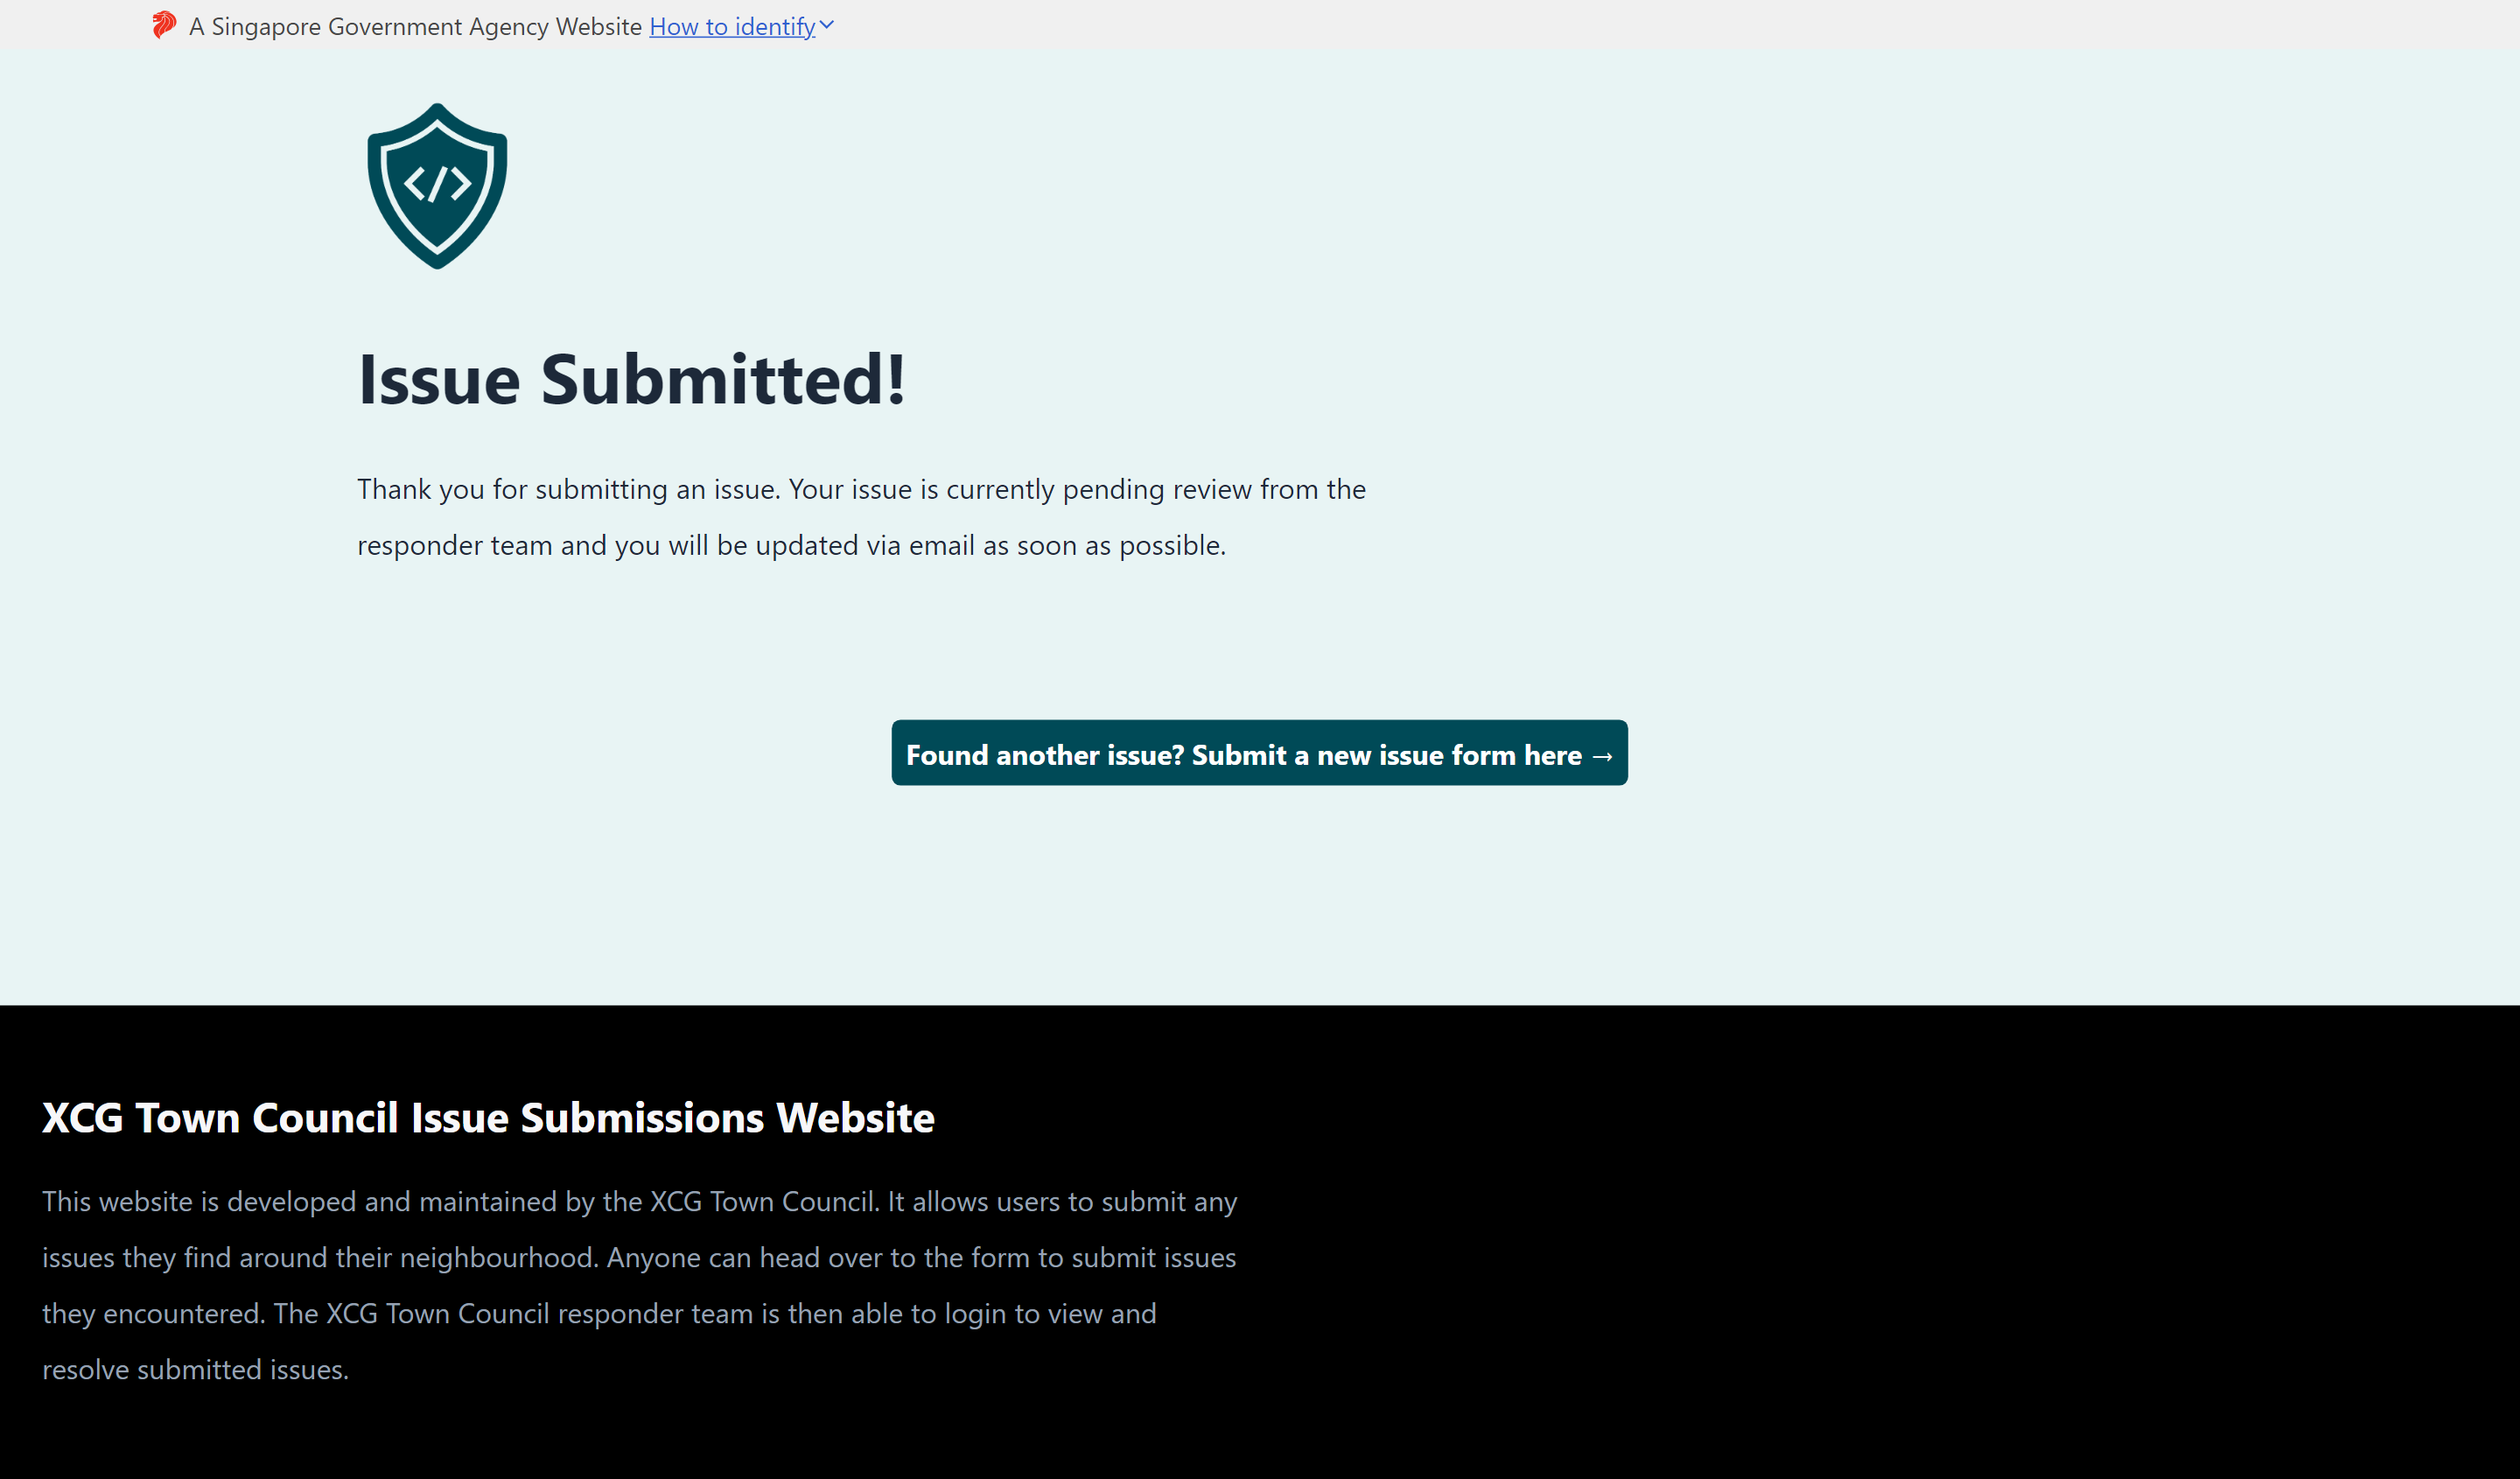
If you start the development server now and submit a form, it should redirect you to the new thank you page as shown below:
If you are having difficulties following the tutorial up to this point, the full source code and configuration files for the towncouncil project folder can be downloaded using this link. Replace the contents of your outer towncouncil folder (the one containing manage.py) with the extracted contents of the downloaded zip file.
Restricting the image type using securefileupload
At this point, we have created the basic functionality for our website. Users are able to view the landing page when they navigate to our site, access the issue submission form, and submit an issue with evidence attached.
However, from a security perspective, we probably don't want to allow users to upload any file they want as evidence when submitting issues. File upload functionality is a common source of security vulnerabilities, potentially allowing malicious users to execute arbitrary code on our server by uploading carefully crafted files containing malicious code. To protect our website against such attempts, we can leverage on the Secure File Upload XCG package.
Secure File Upload's features include (among others):
- Restricting file upload by type (based on checking file extensions as well as file signatures)
- Limiting allowed file size/length of file name
- Analyzing files for potentially malicious content
For more detailed information on usage and configuration options, refer to the package documentation.
For our use case, since we want the evidence to be photographic, we should restrict the file type to either PNG or JPEG. To prevent large file uploads from crashing our site, we will also limit the file size to 3 MB and below.
Let's begin by installing the Secure File Upload package into our virtual environment. Ensuring that your virtual environment is active, run the command below:
- Unix/macOS
- Windows (PowerShell)
- Windows (CMD)
python3 -m pip install govtech-csg-xcg-securefileupload
py -m pip install govtech-csg-xcg-securefileupload
py -m pip install govtech-csg-xcg-securefileupload
yara-python installation issues on Windowsyara-python is a dependency which will be installed alongside the govtech-csg-xcg-securefileupload package. If you encounter an error installing the yara-python package on a Windows machine, try to resolve it by running the following command and then attempting to install the Secure File Upload package again:
py -m pip install yara-python==4.2.3
Once the package has been installed, we can set up and configure it to meet our needs. Open the settings.py file in the inner towncouncil folder and add the highlighted line below to your MIDDLEWARE list in order to activate the file validation middleware:
MIDDLEWARE = [
    'django.middleware.security.SecurityMiddleware',
    'django.contrib.sessions.middleware.SessionMiddleware',
    'django.middleware.common.CommonMiddleware',
    'django.middleware.csrf.CsrfViewMiddleware',
    'django.contrib.auth.middleware.AuthenticationMiddleware',
    'django.contrib.messages.middleware.MessageMiddleware',
    'django.middleware.clickjacking.XFrameOptionsMiddleware',
    'govtech_csg_xcg.securefileupload.middleware.FileUploadValidationMiddleware',
]
A Django middleware is a function or class that acts as a "hook" into the request lifecycle. More concretely, they are able to intercept requests before they reach a view function or responses before they are returned to a user, thereby allowing them to modify the behaviour of Django and add useful functionality. For more information about Django middleware, refer to the official documentation.
libmagic issue with Windows and macOS machinesWhen starting the development server after activating the Secure File Upload middleware, you may run into an error that says something like ImportError: failed to find libmagic. Check your installation. If you face this error, stop the development server and try the steps below before starting it again:
- Windows
- macOS
py -m pip uninstall python-magic
py -m pip install python-magic-bin
python -m pip uninstall python-magic
brew install libmagic
Next, in your models.py file under the issues folder, import xcg_file_validator from the Secure File Upload package and add it as a validator to your model's evidence field.
from django.db import models
from django.utils import timezone
from django.core.validators import RegexValidator
from govtech_csg_xcg.securefileupload.validators import xcg_file_validator


class Issue(models.Model):
    # Personal particulars of submitter
    first_name = models.CharField(max_length=100)
    last_name = models.CharField(max_length=100)
    email = models.EmailField(max_length=100)
    phone = models.CharField(max_length=8, validators=[RegexValidator(regex="[986][0-9]{7}")])

    # Information about the issue
    summary = models.TextField()
    description = models.TextField()
    location = models.TextField()
    evidence = models.FileField(upload_to="uploads/issues/%Y/%m/%d", validators=[xcg_file_validator])
    submit_date = models.DateTimeField("date submitted", default=timezone.now)
    type = models.CharField(
        max_length=10,
        choices=[
            ("Facilities", "Facilities"),
            ("Road", "Road"),
            ("Sewerage", "Sewerage"),
            ("Others", "Others"),
        ],
        default="Others"
    )
    status = models.CharField(
        max_length=8,
        choices=[
            ("Pending", "Pending"),
            ("Open", "Open"),
            ("Resolved", "Resolved")
        ],
        default="Open"
    )

    def __str__(self):
        return self.summary
This validator transparently detects when the middleware labels a file as "blocked" and causes form.is_valid() to return False in such a case.
A Django validator is any callable - i.e. something that can be "called" like a function - that takes in a value and raises a ValidationError if it doesn't meet some criteria. Validators can be added to model fields to enforce custom restrictions or checks. For example, the built-in RegexValidator class verifies that the provided value conforms to a particular string pattern. For more information on validators, refer to the official Django documentation.
Finally, we have to configure Secure File Upload for our submit_issue view to allow only PNG or JPEG files, and to restrict file sizes to 3 MB or below. To do this, open views.py in your issues folder and add the highlighted lines below:
from django.shortcuts import redirect
from django.http import HttpResponse
from govtech_csg_xcg.securefileupload.decorator import upload_config
from .forms import IssueForm


@upload_config(whitelist_name="CUSTOM", whitelist=["image/png", "image/jpeg"], file_size_limit=3000)
def submit_issue(request):
    if request.method == "POST":
        form = IssueForm(request.POST, request.FILES)
        if form.is_valid():
            form.save()
            return redirect("thank_you") # Replace the line "return HttpResponse(...)"
    else:
        form = IssueForm()

    return render(request, template_name="submit_issue.html", context={"form": form})
The upload_config decorator allows us to override Secure File Upload's default configuration for just this specific view. For other configuration methods, refer to Secure File Upload's package documentation.
In Python, a decorator is a function that takes in another function as an argument and returns a modified (or "decorated") version of the target function. They can be applied using the @decorator syntax by placing the decorator name above the target function's definition line - this causes the target function's behaviour to be modified without changing the target function's code. For a more comprehensive explanation, refer to this article.
With the set up and configuration done, let's try to verify that Secure File Upload is indeed working. For ease of testing, a list of sample files are provided below, along with their intended outcomes.
| File | Size | Expected outcome | Reason for blocking |
|---|---|---|---|
| Acceptable PNG file | 24 KB | Allow | N/A |
| Acceptable JPEG file | 26 KB | Allow | N/A |
| PDF file | 293 KB | Block | Not PNG or JPEG |
| PDF file with extension changed to PNG | 293 KB | Block | Not PNG or JPEG |
| Large JPEG file | 8.7 MB | Block | Size > 3 MB |
If you are having difficulties following the tutorial up to this point, the full source code and configuration files for the towncouncil project folder can be downloaded using this link. Replace the contents of your outer towncouncil folder (the one containing manage.py) with the extracted contents of the downloaded zip file.